Garden Obelisks – A Beautiful Trellis
A year ago, I asked James to build three garden obelisks. We had seen some the previous summer when we did family walks through our old neighborhood and I knew I wanted to incorporate them into our garden. After shopping online, I quickly realized it was going to be another DIY project. So I switched gears and started looking for how-to tutorials and then shared my vision with James.
How to Build Them:
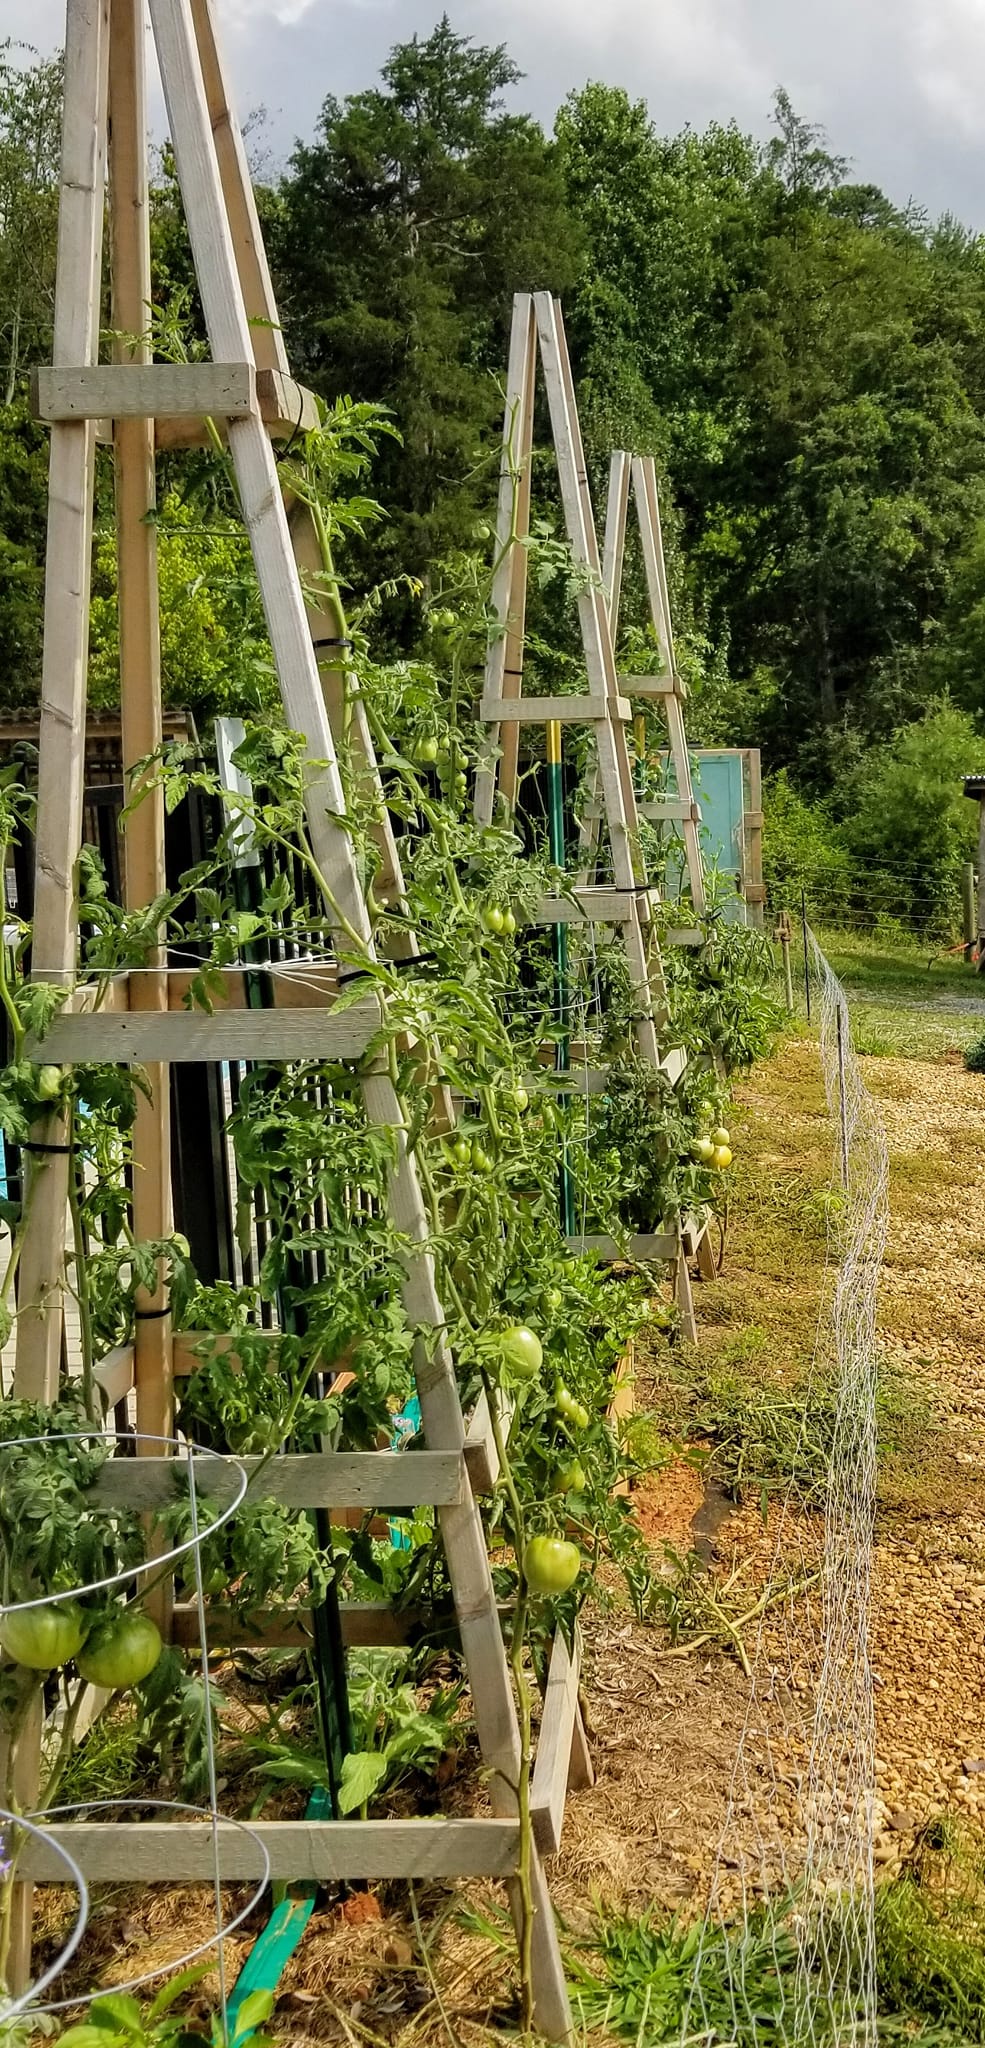
We used 2×2×8 for the vertical pieces. The horizontal rungs are made from 2×1 scrap wood, making the materials cost about $16 per obelisk. The original directions suggested using tent stakes in each corner to keep the obelisks from blowing over. However, that didn’t work well enough for us. We ended up putting a t-post in the center and then tying the obelisk to the t-post. To see the step-by-step tutorial we followed, click here.
How We Used Them:

While these obelisks could be used to trellis anything, we chose to use them for tomatoes. With the nearly 2 foot space between the legs at the bottom, it was perfect spacing to put a tomato plant at each corner, giving support to 12 tomato plants in all. I used reusable zip ties to secure the plants to the obelisks.
The Finishing Touches…A Year Later

James had offered to paint the garden obelisks last year after he finished building them, but we decided it was better to have him spend his time on the chicken coop he was building instead. So, here we are a year later, finally painting our obelisks. I brought them into our garage just before a winter storm so I’d have an indoor project to work on. The legs were buried a few inches into the dirt and need to completely dry before I can finish painting them. These obelisks worked so well this year that we want to help them last for years to come!