How to Start Seeds Indoors to Grow Your Own Transplants
This post contains affiliate links which won’t change your price but will share some commission. Thank you for supporting us!
The first year we started seeds indoors you could either say was a partial failure or a great learning experience. I prefer to focus on what we learned!
Our First Attempt at Starting Seeds
I thought our sunroom would be the perfect place to grow our seedlings, since it is a sunroom and has great southern exposure. What I found out is even though I had the plants right in front of the windows, they were still getting leggy. This means they were not getting enough light. My hypothesis is that the windows in our sunroom are too energy efficient to allow enough of the right kind of light waves through that the plants need. I started moving the plants outside daily on the warmest days to try to give them enough sunlight. Many of the plants were warm season plants such as tomatoes and eggplants. While some of the plants survived until transplanting size, this was not the ideal setup.
Our Second Attempt at Starting Seeds
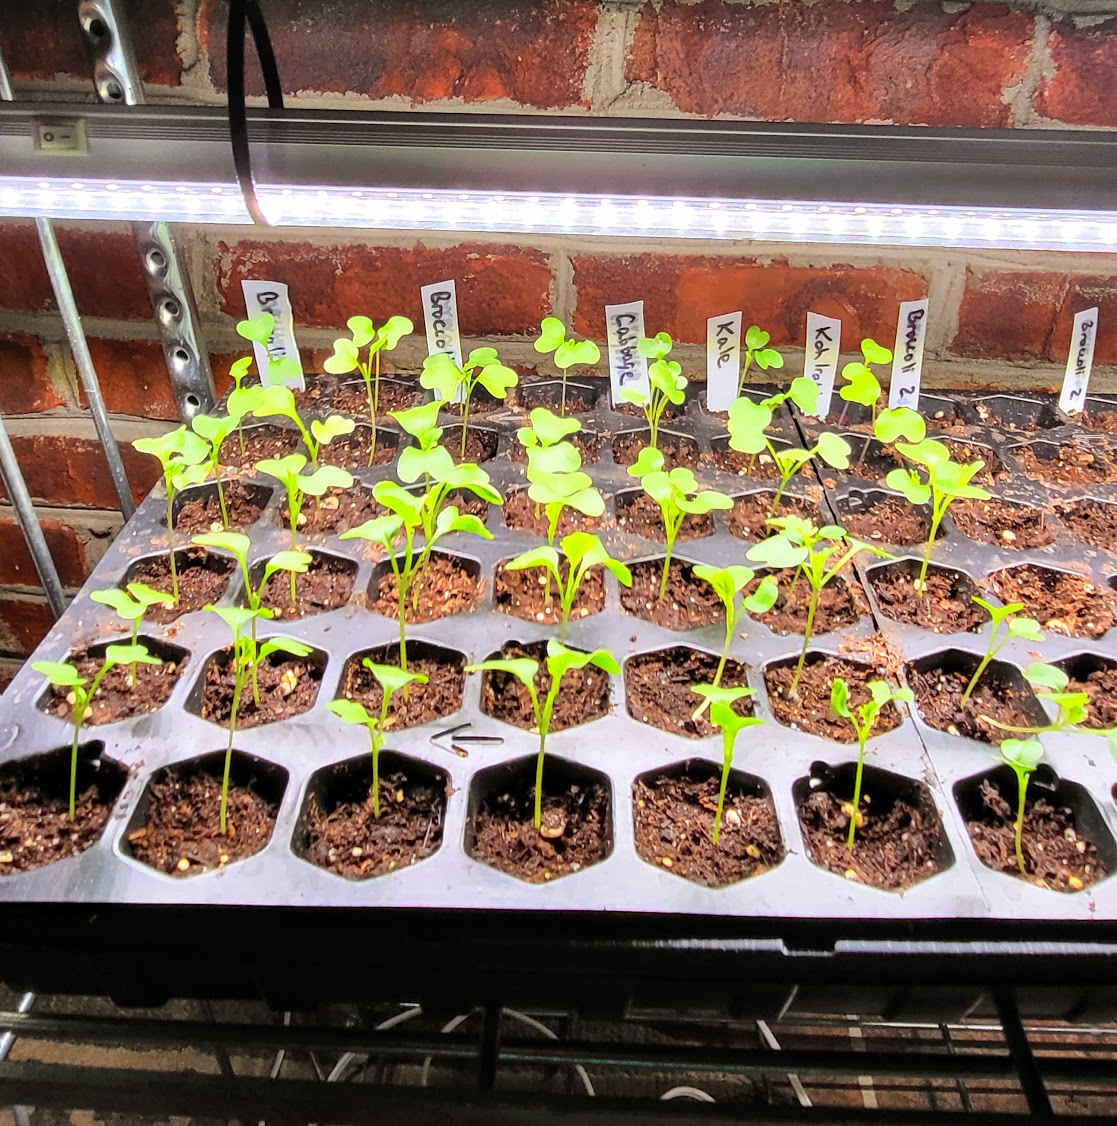
From our first attempt, I learned that we needed to have a grow light. So, we ordered these grow lights and had much better success! What I love about this grow light is that its length fits perfectly with the chrome wire shelves we already have. I just had to rearrange a few things to make room for a couple of trays of plants. Our grow lights are paired with an outlet timer (from our Christmas lights) so I do not need to remember to turn them on and off. I have it set to go on at 4 AM and turn off at 6 PM, giving our plants 14 hours of light.

When to Start Seeds
When to start your seeds is depending on your growing zone and what you want to plant. If you do not know your growing zone, start by finding it here on the USDA Plant Hardiness Zone Map. There are many resources you can use to help you determine when to start you seeds. One option is looking on the back of the seed packet. They often will tell you when to plant based upon geographic location of last frost day. Another way is to find a planting chart such as this one for Zone 7 from Urban Farmer.

Getting Your Equipment Ready
The first step is to gather tools and equipment. If you are reusing things from last year, it’s good practice to clean and disinfect garden tools and pots to prevent the spread of disease. I used one part bleach to 9 parts water, letting them soak for 10 minutes, then rinsing them off and letting them dry before use.

Instead of using seed starting trays, you can use any container you have on hand…yogurt containers, milk jugs, egg cartons, etc. A different technique I want to try is soil blocking where the soil is packed together and there is not container, just a tray to set the soil blocks on. No matter what container you are using, you need a growing medium. I have tried the peat pellets and wasn’t a huge fan. Instead, I prefer to use a seed starter potting mix.
Time to Plant Seeds!
Now that you have all your equipment gathered, it’s time to get planting! It’s helpful to moisten the seed starting mix before filling the trays. Putting the soil and water in a bucket or bin works best. Our three year old daughter loved helping with mixing the water and soil together! She also helped me fill the trays with the seed starting mix, leaving about a half inch at the top.


Then, I put a few seeds into each cell. Lastly, I gently packed more soil on top of the seeds, paying attention to the planting instructions on the seed packets (these seeds all needed to be covered with a ¼ inch of soil. Check your seed packet directions because your seeds may need to be planted at a different depth).
Don’t forget to label your seeds! Cutting a plastic container (such as a milk jug) into strips works very well. I also like to write on my seed packets when I planted the seeds as a form or record keeping.


Covering the seed trays with the plastic lid helps keep the moisture in, requiring less watering while you wait for the seeds to germinate. If you don’t have a plastic lid, you can drape plastic wrap over the container. Once the seeds have germinated, the lid should be vented or completely removed to allow for air circulation and to prevent disease.

As soon as your seeds have sprouted, make sure they are under a good light source. Keep your seedlings moist until you are ready to harden them off. Happy growing!